Trek Grade
Easy - Moderate
Highest Altitude
13,800 ft
Base Camp
Kasol HP
Best Time
April to June
Sar Pass Trek – Cost, Itinerary, Route & Difficulty 2026
Starting from INR 8500
Package Variant
from Kasol to Kasol
from Delhi
to Delhi

- 🧥 Free poncho / raincoat
- 🎫 Certificate
- 🎁 Free Rs 500 voucher
- 🎒 10% flat discount on rentals
- 🏨 20% discount of Tripli Hotels
- 🚌 10% discount on volvo bus booking
- 🧥 Free poncho / raincoat
- 🎫 Certificate
- 🎁 Free Rs 500 voucher
- 🎒 10% flat discount on rentals
- 🏨 20% discount of Tripli Hotels
- 🚌 10% discount on volvo bus booking
Sar Pass Trek – Cost, Itinerary, Route & Difficulty 2026
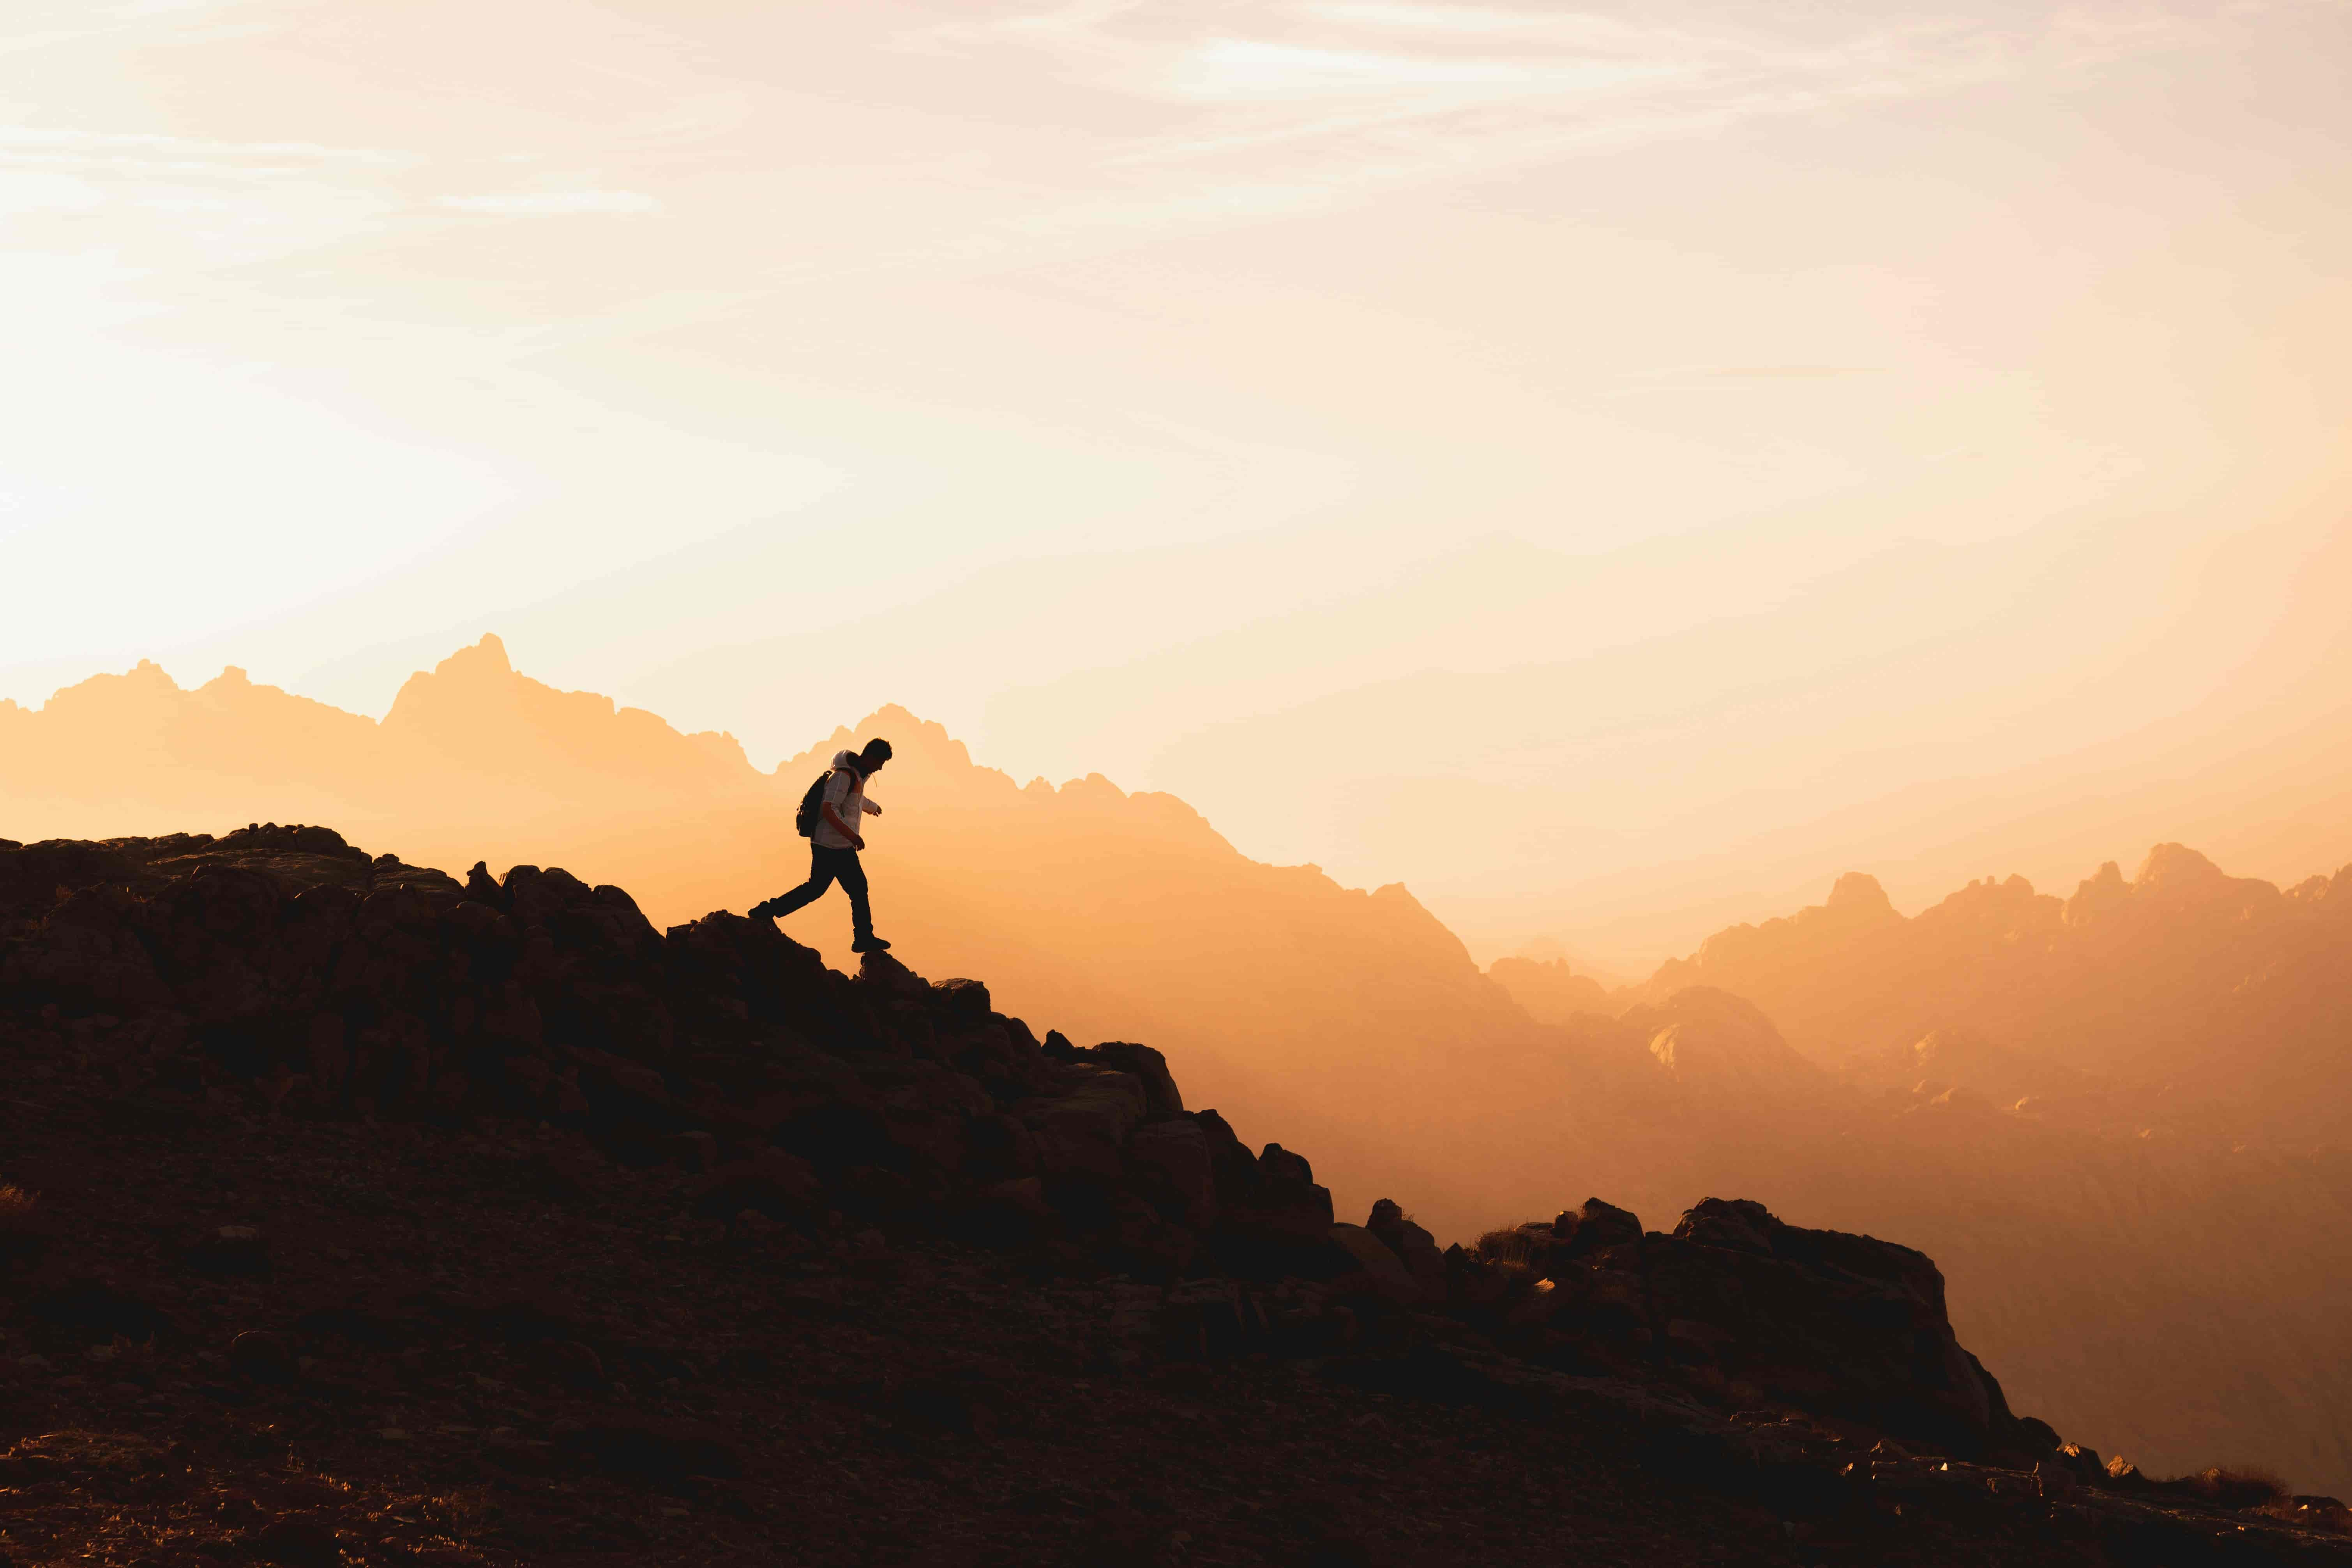
The first crack of dawn in the Parvati Valley feels unreal — the faint scent of pine trees, the soft crunch of snow beneath your boots, and a calm silence that only the mountains can hold.
As the golden rays touch the white peaks of the Himalayas, you feel something shift within you — a quiet thrill, a sense of belonging, and the realization that life is most alive when it’s simple.
That’s the magic of the Sar Pass Trek — where every step tells a story. It’s not just a trail; it’s a journey through whispering forests, frozen meadows, and starlit camps that make you forget the world below.
And for 2026, this legendary trek in Himachal Pradesh promises to be even more breathtaking, accessible, and soul-stirring.
Overview of the Sar Pass Trek
The Sar Pass Trek is one of Himachal Pradesh’s most iconic Himalayan trails, nestled in the Parvati Valley of the Kullu region.
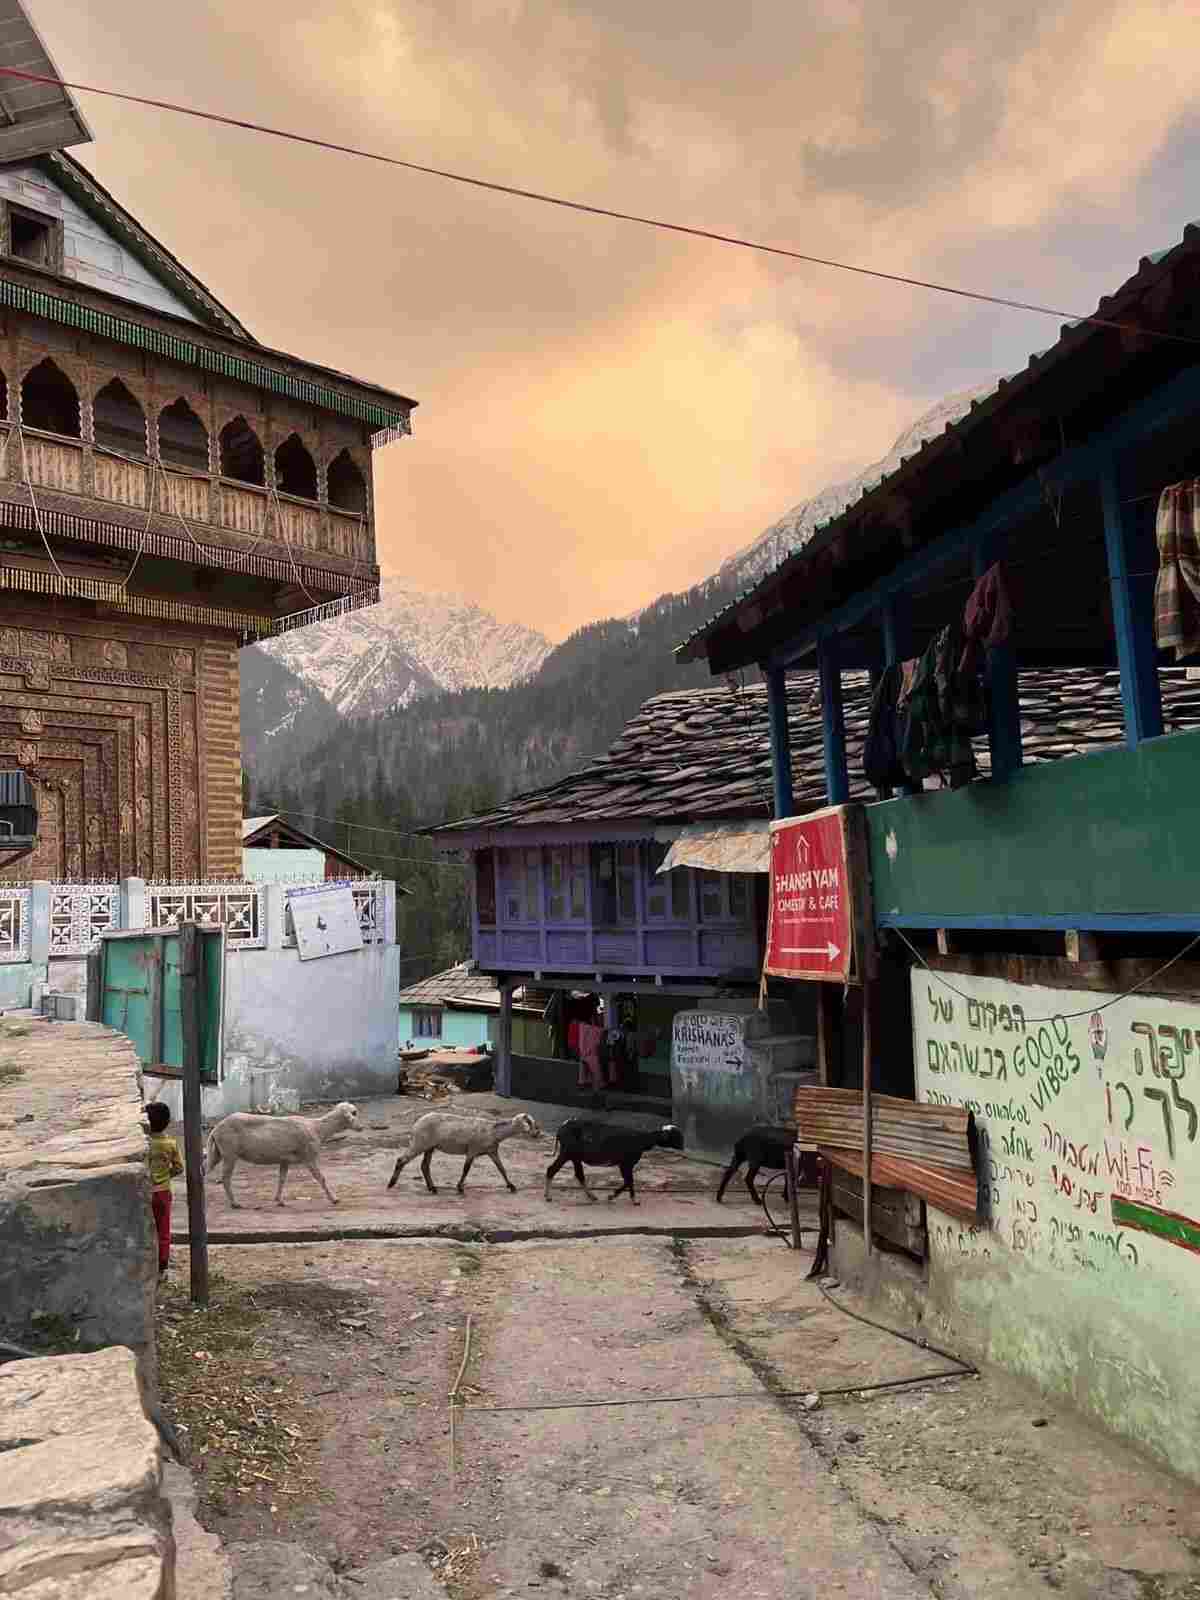
It starts from Kasol, a vibrant riverside village often called the “mini Israel of India,” and ascends all the way to an altitude of 13,800 ft (4,200 m) — crossing forests of pine, alpine meadows, frozen lakes, and snowy passes.
-
🏔️ Location: Kasol, Parvati Valley, Himachal Pradesh
-
⏱️ Duration: 5 days and 4 nights
-
🚶♂️ Difficulty Level: Easy to Moderate
-
📏 Maximum Altitude: 13,800 ft / 4,200 m
-
🌄 Starting Point: Kasol
-
🏕️ Best Season: April to June
What makes it truly special is its diversity — from dense forest walks to snow slides, from tranquil campsites to panoramic summit views. The Sar Pass Trek lets you experience every flavor of the Himalayas within just a few days and that too in the month of April and June where finding snow and snowfall is a very rare sight
Must Read Before Booking Sar Pass Trek
What Makes Sar Pass a Serious Himalayan Trek?
Sar Pass is not just about reaching a high point and coming back. It is a continuous climb through forests, villages, open meadows, snowfields, and exposed mountain terrain spread across multiple days.
The altitude gain is gradual, but physical and mental fatigue accumulates day after day. By the time trekkers reach summit day, it is not just leg strength that matters — breathing, balance, focus, and decision-making all come into play.
This is why Sar Pass demands proper acclimatisation, experienced trek leadership, and disciplined pacing throughout the journey.
How Each Day Actually Feels on Sar Pass?
The first two days feel deceptively comfortable — green trails, village walks, shared conversations, and relaxed camps.
By Day 3 and Day 4, the terrain opens up. The air feels thinner, nights become colder, and even simple tasks require more effort than expected.
Summit day begins before sunrise. Movement is slow, steady, and often silent. This is where trekkers realise Sar Pass is not about speed — it is about endurance and mental calm.
Crossing the pass delivers a sense of achievement that stays long after the trek ends.
Why Summit Day Is the Hardest (And Most Rewarding)
Summit day on Sar Pass is long, cold, and mentally demanding. The climb happens when the body is already tired from previous days of continuous walking.
Snow conditions, wind speed, and overall group energy play a crucial role. Trek leaders constantly assess weather and trekker condition before taking a final call on the summit attempt.
Reaching the top is rewarding not because it is dramatic — but because it is earned.
Common Mistakes First-Time Sar Pass Trekkers Make
• Underestimating daily walking hours
• Ignoring fitness preparation
• Carrying unnecessary weight
• Not hydrating enough at altitude
• Choosing operators based only on price
Most summit failures do not happen because people are “unfit”. They happen due to poor preparation and rushed execution.
Who Should & Who Should Not Do Sar Pass Trek
Sar Pass is suitable if you:
-
Are reasonably fit and can walk for long hours
-
Are mentally prepared for cold and physical discomfort
-
Want a true Himalayan trekking experience, not a picnic trek
Sar Pass may NOT be suitable if you:
-
Expect luxury or comfort-focused travel
-
Are physically unprepared
-
Want a short or easy trek
Safety, Acclimatisation & Trek Execution
Sar Pass Trek is designed with gradual altitude gain, allowing the body enough time to adapt when the trek is executed correctly.
However, altitude affects every individual differently. Proper pacing, hydration, nutrition, acclimatisation routines, and experienced trek leadership play a critical role in completing the trek safely.
On Sar Pass, safety is not about pushing limits — it is about controlled movement, constant monitoring, and weather-based decision-making.
Walking Through the Changing Worlds of
Sar Pass Trek
The journey begins in Kasol, where the aroma of Israeli food mingles with mountain air and the sound of the Parvati River follows you everywhere.
The early trails lead you through quaint hamlets, pine-lined paths, and bubbling streams — nature’s rhythm in perfect sync with your heartbeat.
As you climb higher, the landscapes transform — from lush greenery to alpine meadows dotted with wildflowers, and finally to the glistening snowfields near the summit.
The night skies turn into a galaxy canvas, and campfire nights fill with laughter, songs, and stories of trekkers who came seeking adventure but found peace.
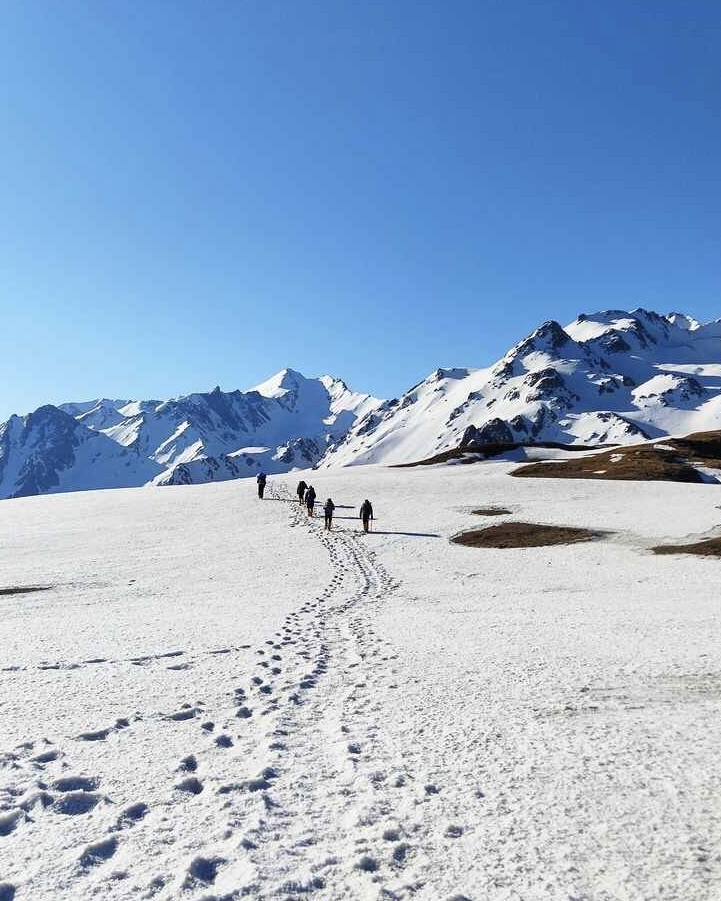
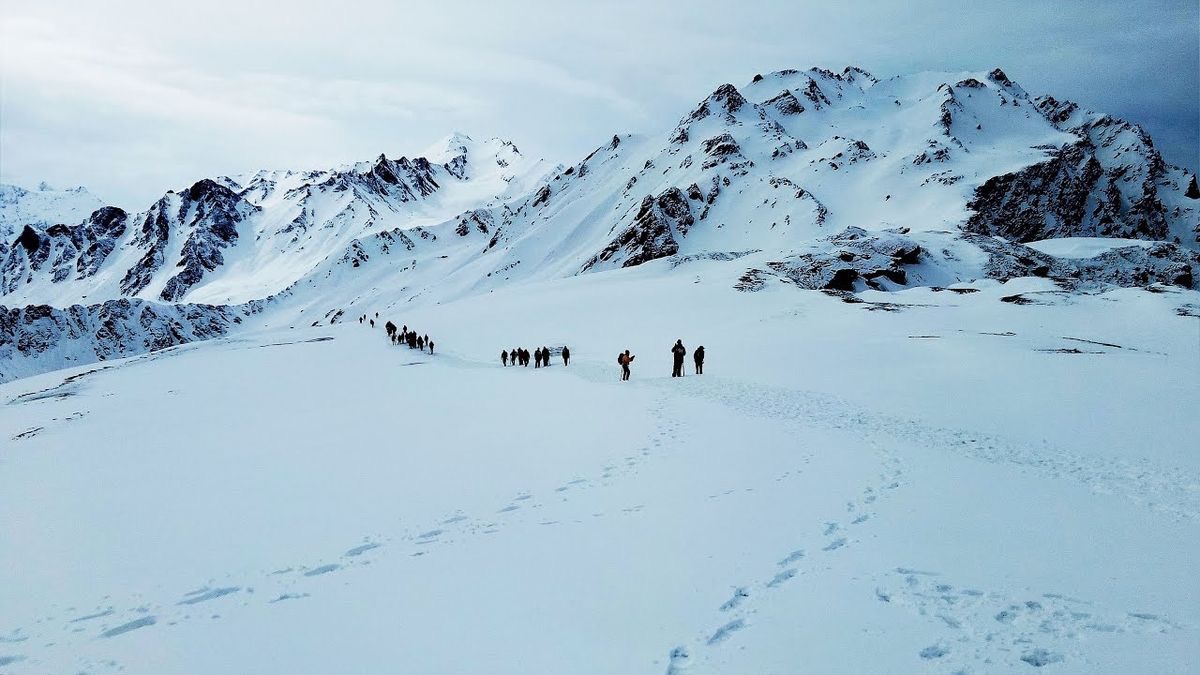
Crossing Sar Pass itself is a thrill — a snow-laden slope where trekkers slide down hundreds of meters, laughing like kids, surrounded by snow peaks that seem close enough to touch.
The descent toward Barshaini rewards you with views of sprawling valleys and dense pine forests — a perfect reminder that the mountains always give back more than they take.
Why Choose Dream Trips for
Sar Pass Trek 2026
When you trek with Dream Trips, you don’t just join a group — you join a family that lives and breathes the Himalayas.
Here’s why thousands of trekkers trust us every year:
✅ Experienced & Certified Trek Leaders – Led by professionals trained in mountain safety and first aid.
✅ Safety-First Operations – We prioritize acclimatization, weather assessment, and emergency preparedness.
✅ Budget-Friendly Pricing – Transparent packages with no hidden costs.
✅ Free Rental Gear – Trekking poles, gaiters, and microspikes available where applicable.
✅ Personalized Group Handling – Smaller groups for better attention and bonding.
✅ Active Since 2019 – Over 1000+ happy trekkers who call us their mountain family.
✅ Sustainability Focus – Clean-trek initiative promoting “Leave No Trace” ethics.
✅ Authentic Himalayan Access – Real local experiences, not commercial rush.
Best Time to Visit Sar Pass Trek
The best time for the Sar Pass Trek is April to June, when the valley transforms into a mix of green meadows and glistening snow carpets.
-
🌸 April–May: Snow still blankets the higher regions — perfect for those who love pure white landscapes and snow slides.
-
🌤️ June: Meadows bloom and trails become easier; ideal for first-timers seeking comfort and mild weather.
After June, the monsoon begins, and the region becomes slippery and risky for trekking — hence, April to June remains the golden window.
Difficulty Level & Fitness Requirements
The Sar Pass Trek is rated Easy to Moderate, making it perfect for beginners and occasional trekkers.
You don’t need prior high-altitude experience — just decent stamina and determination.
Fitness Tip:
Prepare with regular walks, stair climbing, and light cardio for 3 – 4 weeks before the trek.
You’ll cover 5 – 10 km daily, with gradual altitude gain, so consistent pacing is key.
At the summit, temperatures can drop below freezing even in May, so good layering and waterproof gear are essential.
Local Culture, Flora & Fauna
Sar Pass is not just about mountains — it’s about the soul of Himachal’s Parvati Valley.
The local villagers are warm and welcoming, often greeting trekkers with smiles and cups of hot tea.
You’ll come across traditional Himachali houses, prayer flags fluttering on cliffs, and shepherds leading flocks through the alpine grasslands.
The valley is rich in flora and fauna — think oak, pine, rhododendron, and occasional Himalayan monals or mountain goats gracing the slopes.
Conclusion
Step into the Wild Side of the Himalayas
The Sar Pass Trek 2026 is more than a mountain adventure — it’s a journey through time, silence, and self-discovery.
It’s where you’ll walk through clouds, laugh with strangers, and realize that sometimes, the best signal you’ll ever get is from your heart.
So pack your bags, lace up your boots, and answer the mountains’ call.
Because the Himalayas are waiting — and your story is yet to be written.
✨ Book your Sar Pass Trek 2026 today and let the mountains move you.
Dream Trips has been curating real Himalayan experiences since 2019, bringing authentic adventure to those who seek nature, connection, and courage.
Video for You
Relive the thrill of the Sar Pass Trek through real moments from the trails of Kasol, Himachal Pradesh. Watch snowy ascents, campsite laughter, and the true spirit of Himalayan adventure come alive.
Trekking Tips to Help You Trek Like a Pro
Every successful Sar Pass Trek begins with smart preparation and mountain awareness. These trekking tips are drawn from real Himalayan experience — from pacing your climbs and staying hydrated at high altitudes to layering right for unpredictable weather. Learning how to trek like a pro isn’t about speed; it’s about balance, endurance, and respect for the terrain. Follow these field-tested Himalayan trekking tips to make your Sar Pass adventure safer, smoother, and far more rewarding.
Sar Pass Trek Real On - Ground Execution
The Sar Pass Trek is not just defined by its route or altitude, but by how each day is executed on ground. Factors such as pacing, rest cycles, campsite management, and weather-based decisions play a crucial role in how the trek unfolds over multiple days in the Himalayas. A well-executed Sar Pass trek focuses on realistic timelines, steady movement, and constant assessment of trail and weather conditions rather than rushing for milestones. This approach leads to a smoother trekking experience and higher completion rates on the pass.
Day Wise Detailed Itinerary
▸ Starting Point: Kasol
▸ End Point: Grahan Village
▸ Trek Distance: 9 km
▸ Duration: 6–7 hours
▸ Elevation Gain: 2,700 feet
▸ Reporting time: 9 AM
▸ Altitude: 5,000 feet
Elevation Gain & Trail Difficulty
-
First 1–3 km: Flat to gentle rolling; trail follows Parvati river on a flat riverbank shelf — gradient 0–5°.
-
Mid section (3–7 km): Mostly steady uphill on compact dirt path; gradient 5–12°.
-
Final 1–2 km: Short rocky ascent up the village ridge; gradient up to 15–18% on exposed scree/rocks.
-
Technical difficulty: low.
Terrain & route behaviour
Trail behaviour: Marked, heavily walked, village traffic; true left (west) of Grahan Nalah is the correct alignment. Expect solid booted footfall paths and intermittent stone retaining steps in terraced sectors.
Navigation cues:
▸ Begin from Kasol market → walk toward the steel/wooden footbridge over Parvati → keep true-left.
▸ After a cluster of houses and one last major wooden plank bridge, the trail lifts away from river and begins a rocky ascent — do not attempt to contour lower toward temporary jeep roads; they deviate from official path.
▸ Visual cue for Grahan: a cleared ridge dotted with apple trees and tarpaulin vendor stalls.
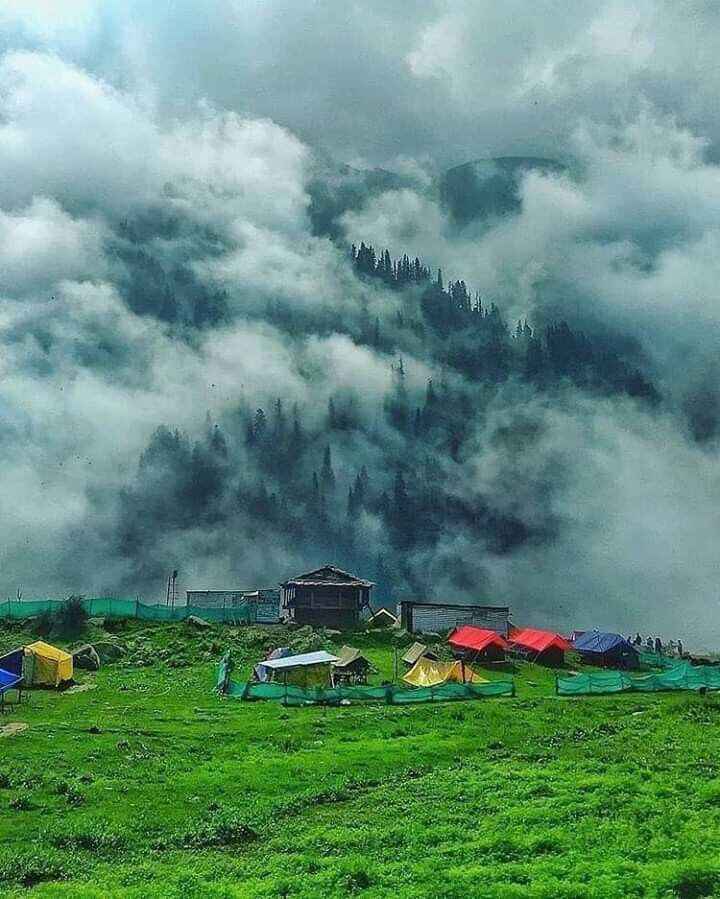
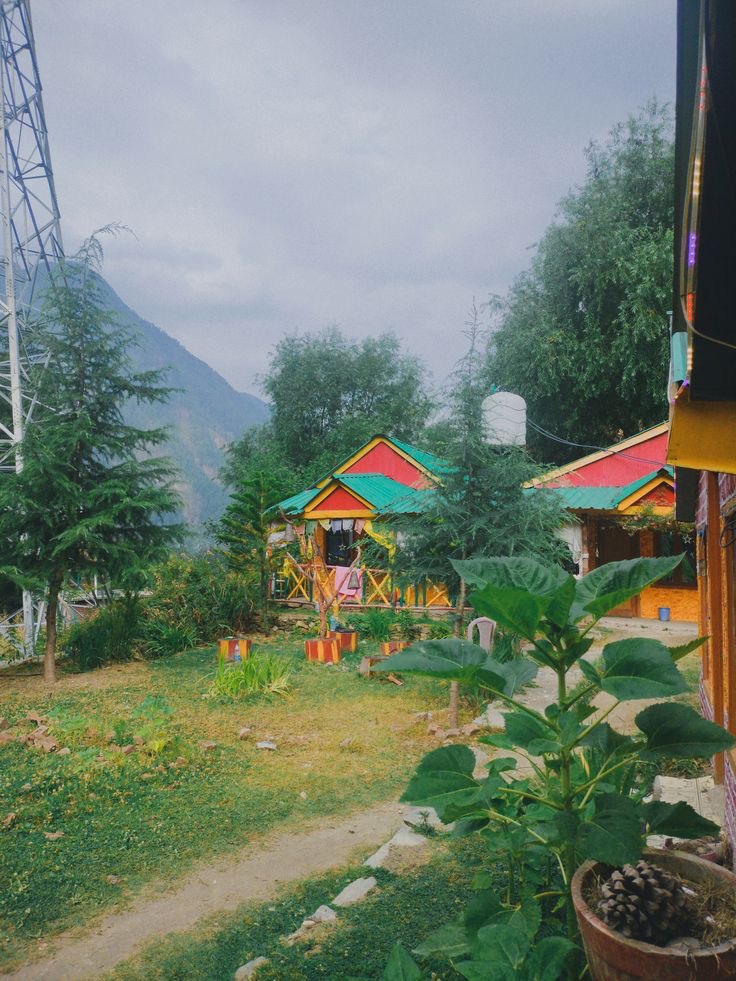
Campsite Details
▸ Ground: grass + compact soil; generally dry in pre-monsoon and post-monsoon. Pitching area naturally sloped — choose high point for tent to avoid drainage.
▸ Wind: valley-protected; dominant winds usually channel along the Parvati valley (N–S), but ridge reduces gust severity.
▸ Noise & amenities: village ambient noise; small guesthouses available; satellite phone sometimes present.
Water & resupply
▸ Sources: Village tap, springs near settlement. Reliability: high in May–Oct, reduced late winter (Jan–Feb) and moderate availablity during the trek season ( april - may - june )
▸ Action: Treat or boil. Carry 1 L each for hot water storage and regular water storage to use duing the trek
Hazards, common mistakes
▸ Loose scree near final climb — Watch for ankle rolls.
▸ Trail confusion: Faint jeep tracks may tempt; they often follow riverbed and dead-end. Use village stalls / apple trees as positive confirmation.
▸ Rain: Short heavy showers make final rocky steps slippery.
✅ Meals included: Packed lunch , evening snacks and hot dinner
Dream Trips Tip of the day: Walk slowly though it might look very easy at the inital 5-10mins of your trek - hydrate yourself properly & don't stress yourself , just enjoy the scenic route along with the parvati valley
▸ Starting Point: Grahan
▸ Ending point: Minh Thach
▸ Trek Distance: 7 km
▸ Duration: 5 – 6 hours
▸ Elevation Gain: 4,200 feet
▸ Altitute: 11,150 feet
Elevation Gain & Trail Difficulty
▸ Overall gradient: moderate to steep; average 7–14% with intermittent pitches of 15–22% on short sections.
▸ Technical difficulty: Moderate due to sustained gain and narrower forest tracks.
Terrain & route behaviour
Sequence: village trail → managed stone steps → denser conifer canopy (pine/deodar) → steeper scramble → ridge opening.
Navigation cues:
▸ From Grahan camping ground head north; after gentle upslope the track narrows under heavy canopy — visibility reduces and bootpacked line becomes single file.
▸ Look for small stone cairns and flattened grass tracks where villagers move cattle.
▸ At crest, Min Thach appears as a long green plateau; vendor cupola/tap marks central location.
Campsite details
▸ Ground: grassy meadow; soils compacted from seasonal grazing; best tent sites along ridge crest near the tap.
▸ Wind & exposure: moderate; the ridge offers a degree of lee depending on approach direction — choose leeward side (typically eastern edge) for lower wind load.
▸ Drainage: trenches advisable in monsoon months; minor depressions collect run-off.
Hazards & seasonal notes
▸ Visibility drops under canopy and fog — follow bootpack traces.
▸ Snow edges: From April onwards small snow patches can remain on shady north faces; microspikes may be helpful in early season.
▸ Acclimatisation: significant altitude jump — maintain slow cadence and rest every 30–45 minutes; watch for mild AMS signs.
✅ Meals included: Breakfast, packed lunch , evening snacks and hot dinner
Trek Leader’s Note:
At Min Thach, altitude starts to show itself. Take it easy, stretch, and stay hydrated — the mountain rewards patience.
▸ Starting Point: Minh Thach
▸ Ending point: Nagaru
▸ Trek Distance: 6 - 8 kms
▸ Duration: 4 to 6 hours
▸ Elevation Gain: 1,310 feet
▸ Altitute: 12,450 feet
Elevation Gain & Trail Difficulty
▸ Profile: mixed — initial gentle ridgeline → steep wooded pitches → exposed rock → final steep gain to plateau. Gradient variable: 6–25% on short sections.
▸ Technical difficulty: Moderate to Difficult in snowy/icy conditions.
Terrain & route behaviour
▸ Do NOT attempt to go straight up the obvious ridge if you see multiple faint animal trails — the trail detours via the southward woods to reach a safer bootpacked line.
▸ After exiting woods there is a rocky crest; initial hundred metres often have cairns/boot lines. Beyond this the trail can become intermittent — prefer packed snow lines in winter or rock ledge traces in summer.
▸ Water tap is on the western edge of Nagaru (intermittent).
Campsite micro-details
▸ Ground & exposure: plateau with cliff edges — prime views northward. Extreme wind chill; tent platforms limited. Pitch in hollows or behind rock buttresses.
▸ Night temps: drop sharply due to exposure; condensation risk in tents.
Hazards & winter techniques
▸ Steep slope below ridge — in snow it becomes a high-risk zone. Proper technique: front-pointing on steep icy patches, use of microspikes or crampons, and trekking pole planting. Guides may use an ice-axe to cut steps if needed.
▸ Trail invisibility in snow: route-finding critical — whiteouts can erase tracks; carry GPS track and compass.
▸ Wind & tents: always guy lines, use additional guylines in exposed sites. Anchor points sometimes require deadman anchors in soft snow.
✅ Meals included: Breakfast, packed lunch , evening snacks and hot dinner
Trek Leaders Note:
Do not celebrate too ealry , sleep and rest propery as tomorrow is the grand summit day so make sure to keep yourself hydrated
▸ Starting Point: Nagaru
▸ Ending point: Biskeri thach
▸ Trek Distance: 13 kms
▸ Duration: 6 - 9 hours
▸ Elevation Gain: 1,450 feet
Elevation Gain & Trail Difficulty
▸ Ascent to pass: sustained steep pitches, gradient frequently 15–30% in upper snowfields.
▸ Descent: steep snow chute then mixed moraine and meadow; steepness variable, with sections of rapid downhill
▸ Technical difficulty: Difficult — high altitude, long day, exposure to weather and snow.
Route sequence & navigation cues
▸ Pre-dawn start: mandatory in marginal weather as afternoon clouds raise objective hazards.
▸ Sequence: leave Nagaru early → follow southward ridgeline → several false saddles → identify true pass by frozen pond depression (the “Sar”) or a broad saddle area. In heavy snow the pond is buried — find pass by ridge geometry and guide flags/ropes.
▸ Markers: ropes/cairns may be fixed on steep sections; seasonal trishul/flag sometimes marks the final crest. Use compass to maintain the bearing when whiteout occurs.
Snow behaviour & slide mechanics
▸ Snow types: wind-packed cornices on ridgelines; soft granular snow in mid-day warming; hard icy crust early morning on shaded aspects.
▸ Slide zone: the classic descent includes a long snow chute used for controlled slide — depth and length vary by season. Only slide when snow is soft and slope angle is moderate; hard icy snow is dangerous and requires step-cutting or cramponed descent.
▸ Technique: keep legs together, loose hands, protective goggles; stow valuables. In icy situations: front-point crampon descent, belayed by fixed rope where available.
Campsite details
Ground: expansive bowl meadow with streams; soft grass pads for tents. Water plentiful.
Exposure: less windy than Nagaru but still cold nights. Shelter selection: choose near water but above immediate banks to avoid morning damp.
Nearby features: waterfall and tapping point; view of Tosh / Parvati valley villages.
Hazards & emergency planning
Avalanche risk: present after fresh heavy snowfall and during rapid warming (spring melt). Avoid travel on steep wind-loaded slopes on warming days.
Whiteout: reconnoiter descent visually before committing — identify prominent boulders or rock features as reference points.
Rescue nodes: there is no direct motorable access from Biskeri; emergency evacuation requires stretcher carry to Barshaini via downstream route or helicopter pickup (remote, costly).
✅ Meals included: Breakfast, packed lunch , evening snacks and hot dinner
▸ Starting Point: Biskeri thach
▸ Ending point: Kasol
▸ Trek Distance: 8 - 10 kms
▸ Duration: 4 to 6 hours
▸ Elevation loss: 3,300 feet
Elevation Gain & Trail Difficulty
▸ Descent steepness: variable; several sections 20–35% requiring controlled downclimb; one rope/rappel section of 6–8 m (descent point of previous description may list 20 ft where ropes commonly used).
▸ Technical difficulty: Moderate to Difficult due to route-finding and steep downclimbs.
Route sequence & navigation cues
▸ Sequence: leave meadow → descend left of main stream → breach fenced plot (search for gap) → steep forest descent → rope/rappel assisted section → wooden plank crossings → Pulga/Tulga → bridge across dammed Parvati → Barshaini.
▸ Critical cue: locate the fenced plot break; many faint trails exist — use cairns and local logic; when in doubt, hold bearing towards downstream bridge visible in distance once below heavy forest cover.
Hazards & seasonal notes
▸ Stream crossing: high flows in monsoon and during snowmelt → bridge and plank sections can be submerged/washed out.
▸ Rappel section: rockfall risk and slipperiness — test holds, use fixed rope & harness if available.
▸ Trail density: many informal lines; follow cairn sequences and avoid routes that descend straight into steep gorges.
Exit logistics
▸ Barshaini/Bursheni: motorable roadhead; taxis/buses to Kasol/Bhundar/Bhuntar available irregularly. Phone coverage generally returns near Barshaini.
▸ Post-trek: carry out all non-biodegradable waste: local communities rely on trekkers for minimal seasonal income — leave no trace.
▸ We recommed everyone to include your transpotation in the sar pass trek package while booking in prior
✅ Meals included: Breakfast only
Sar Pass Trek Route Map
Sar Pass Trek Altitude Chart
Inclusions
✅ Accommodation:
4 nights of comfortable tented stay at scenic Himalayan campsites on a sharing basis — offering warmth, safety, and a real outdoor experience under the stars.
✅ Meals:
5 nutritious meals daily — breakfast, lunch, evening snacks, soup, and dinner — starting from Day 1 lunch to Day 5 breakfast. All meals are freshly cooked, vegetarian, and non-spicy, with boiled eggs for protein at breakfast.
✅ Trek Equipment:
Provision of all essential trekking gear, including sleeping bags, tents (sleeping, dining, kitchen, and toilet tents), along with foam mattresses, utensils, crampons, and gaiters for snow conditions.
✅ Trek Crew:
A professional and friendly team consisting of certified trek leaders, guides, high-altitude chefs, and support staff, all trained in Wilderness First Aid and mountain safety.
✅ Health & Safety:
Availability of first aid kits, oxygen cylinders, stretchers, oximeters, and BP machines at every campsite. Daily health monitoring to ensure proper acclimatization and altitude safety.
✅ Permits & Fees:
All forest permits, camping permissions, and local entry fees included — no hidden charges, no extra paperwork for trekkers.
✅ Porters & Mules:
Porters and mules carry trekking equipment, food supplies, and group gear, allowing trekkers to walk light and enjoy the Sar Pass trail comfortably.
✅ Transportation (Optional):
Shared jeep or tempo traveller transport available from Delhi or Kasol, ensuring a smooth start and end to your journey.
✅ Trek Insurance (Recommended):
Optional trek insurance for added safety and peace of mind, covering unexpected emergencies. Plans start from ₹565 per person.
Trek Leader’s Note:
Every inclusion in your Sar Pass Trek is planned with care — from hot soup at sunset to a warm sleeping bag at night. Our goal is to make sure you stay healthy, safe, and comfortable so you can fully experience the beauty and challenge of the Himalayas with Dream Trips.
Exclusions
GST (Goods and Services Tax): A 5% GST charge is mandatory and will be applied to the total cost of your trek.
Meals and Accommodation Not Included in the Itinerary: Any meals or accommodations outside of what is specified in the itinerary are not included.
Transportation Costs: Any bus or airfare to or from the trek start or end point is not covered in the package.
Personal Medical Expenses: We advise all trekkers to carry their own medications and be prepared for any personal medical needs during the trek.
Personal Services: Charges for personal services such as laundry, phone calls, alcoholic beverages, and bottled water are not included.
Entrance Fees: Entrance fees for monuments, monasteries, museums, or temples are not included and should be paid on the spot.
Offload Charges for Personal Baggage: If you wish to offload personal baggage, the charges are INR 365 per day, per bag if paid online (or INR 1500 at base camp). Please note that the weight limit for offloaded bags should not exceed 10 kg.
Emergency Evacuation Charges: Any costs incurred for emergency evacuation are not included and should be planned for accordingly.
Additional Services: Any services or activities that are not specifically mentioned in the inclusions section will not be provided.
Pro Backpacking Tips for Himalayan Treks
Head Gears
When trekking the Sar Pass Trail in the Himalayas, your head gear can be the difference between comfort and struggle. The weather changes quickly — sunny valleys by day, freezing winds by night — and having the right protection keeps you safe, warm, and focused on the trail.
- Head Lamps: When trekking after sunset or starting early from camp, a head lamp is absolutely essential. It keeps your hands free while lighting the rocky, uneven paths. Choose one with long battery life and at least 150–200 lumens for clear visibility in the misty mountain dark. Always pack extra batteries — the cold drains power faster at high altitudes.
- Hats or Caps: During daytime climbs, a wide-brimmed hat protects you from harsh Himalayan sun exposure, while a snug woolen capkeeps you warm at night camps like Nagaru or Biskeri Thach. Make sure your hat has a strap — the mountain wind near Sar Pass (13,800 ft) can be unexpectedly strong.
- Sunglasses: A good pair of UV-protected sunglasses is non-negotiable on snow treks like Sar Pass. They shield your eyes from snow blindness and glaring sunlight reflected off snowfields. Choose wrap-around or snug-fit glasses that stay secure while you climb or slide on snowy slopes.
- Buff or Balaclava: A buff or balaclava is your all-weather companion — protecting your face and neck from biting cold, dust, and harsh sunlight. Lightweight microfiber buffs are great for warm days, while fleece ones work best at high camps. They can be worn as neck warmers, masks, or headbands, depending on the weather and your comfort.
Trek Leader’s Note
Every Himalayan expert knows — protecting your head, eyes, and face is as important as sturdy boots or a warm jacket. Carrying the right head gear for the Sar Pass Trek ensures better endurance, fewer health risks, and more enjoyment on every step of the climb.
Clothes
The Sar Pass Trek takes you through changing landscapes — from pine forests and meadows to snowfields and icy summits — which means your clothing must adapt to sudden temperature shifts. Dressing right in the Himalayas isn’t about fashion; it’s about survival, comfort, and smart layering.
- Base Layers (Inner Wear) - Start with moisture-wicking thermal base layers that keep sweat away from your skin. Cotton is a no-go at high altitude — once it gets wet, it stays cold. Instead, choose synthetic or merino wool thermals that provide warmth without bulk. These will be your first line of defense against freezing nights at camps like Nagaru.
- Mid Layers (Insulation) - Your mid layer traps body heat. A fleece jacket or lightweight down jacket works best for the Sar Pass Trek, especially during evenings or at altitudes above 10,000 ft. You can easily remove or add this layer depending on the temperature. It’s the comfort zone between sweating and shivering.
- Outer Layer (Shell) - The outer layer is your shield against wind, rain, and snow. Carry a waterproof, windproof jacket with a hood — ideally breathable to let moisture escape. Pair it with quick-dry trekking pants that are stretchable and have zip-off sections for comfort in warmer stretches like Kasol and Grahan.
- Trekking Pants and Inner Warmers - Two pairs of trekking pants and one inner fleece pant are ideal. During daytime climbs, go for light, quick-dry trousers, and switch to warmers or thermal pants after sunset. Avoid jeans — they’re heavy, slow to dry, and restrict movement on steep trails.
- Socks and Gloves - Carry 2–3 pairs of woolen socks for warmth and a few synthetic pairs for trekking days. Your hands also need protection — waterproof gloves for snow and fleece gloves for regular days work best. Remember, dry feet and hands equal comfort and endurance on long climbs.
Trek Leader’s Note
Dressing in layers gives you control — you can add warmth at night and peel off layers during steep ascents. Every seasoned trekker in the Himalayas swears by this rule: “Stay dry, stay warm, stay light.” The right clothing for the Sar Pass Trek not only protects you from the elements but keeps your energy balanced throughout the journey. When you trek during the day then usually there is no need of even jackets if the weather is fine but the need of thermals inners , fleece and jackets layering requires once the reach your campsite and mostly during the night for a comafortable sleep
Foot Gears
Footwear plays a key role in how comfortably you experience the Sar Pass Trek. The right pair keeps you steady on snow, safe on steep descents, and relaxed at the campsite after long trekking hours.
- Trekking Shoes: Always use high-ankle, waterproof trekking shoes with firm grip and ankle support. They protect your feet from twisting injuries and help maintain balance on snow-covered and rocky Himalayan trails.
- Slippers / Hiking Sandals: After reaching the campsite or while exploring Grahan Village, switch to lightweight slippers or hiking sandals. They let your feet breathe, recover from heavy boots, and are also useful for crossing small streams or moving around camp comfortably.
- Socks: Carry at least one pair of thick woolen socks for high-altitude nights and 2–3 pairs of normal or quick-dry trekking socks for the trail. Clean, dry socks help prevent blisters and frostbite while keeping your feet warm and odor-free.
- Gaiters and Microspikes: These are essential on snow patches for grip and to prevent snow from entering your shoes. Both gaiters and microspikes are provided complimentary by Dream Trips when required during the trek — you don’t need to carry your own.
Trek Leader’s Note: Never compromise on your footwear. A comfortable, well-fitted pair of shoes and warm socks can make a long climb feel effortless. Remember — happy feet make for happy trekkers, and that’s the key to enjoying every step of your Himalayan journey.
How to reach Kasol?
Kasol, the base village for the Sar Pass Trek, is well-connected by road and easily accessible from major North Indian cities. Here’s how you can reach Kasol comfortably before your trek.
By Train - Kasol doesn’t have a railway station. The nearest one is Joginder Nagar (around 144 km away), but train connectivity is limited. The better option is to take a train to Chandigarh or Pathankot, then continue your journey by bus or taxi. From Chandigarh, the road to Kasol via Bhuntar is scenic and reliable. Most trekkers prefer this route for its comfort and accessibility.
By Bus - This is the most convenient and budget-friendly option to reach Kasol. There are direct overnight semi-sleeper buses from Delhi and Chandigarh to Kasol operated by both private and HRTC services. The journey from Delhi takes about 12–14 hours, while from Chandigarh it’s around 8–9 hours. Please note, sleeper buses are banned in Himachal Pradesh, so only semi-sleeper or seater buses are available. We recommend choosing a trusted operators like Zing Bus , Intercity bus etc and especially during trekking season (April–June).
By Flight - The nearest airport is Kullu-Manali Airport (Bhuntar), located about 31 km from Kasol. You can take a short 1-hour flight from Delhi to Bhuntar, followed by a 1-hour cab ride to Kasol. Flights can sometimes be delayed due to weather, so always check schedules before planning.
Dream Trips Recommendation:
The Delhi/Chandigarh to Kasol overnight semi-sleeper bus is the most reliable and cost-effective way to reach your starting point for the Sar Pass Trek . If you need help arranging your transfers from Bhuntar or Kasol or from Delhi / Chandigarh to Kasol Dream Trip's dedicated support team will assist you plan it in the best and comfortable way.
Approximate cost: 1000 - 1200 INR (one way)


Sar Pass Trek Preparation Guide
Fitness Target
Preparing for the Sar Pass Trek requires more than excitement — it needs physical readiness, consistency, and the right training plan. Even though Sar Pass is graded as an easy–moderate Himalayan trek, it involves long walking hours, steep ascents, snow trails, and an altitude gain from Kasol (5,000 ft) to Sar Pass (13,800 ft). That means your body should be prepared for continuous exertion at high altitude where oxygen levels drop.
To be physically ready, aim to cover 4.5 km in under 45 minutes through jogging, brisk walking, or light running. This ensures your lungs and legs are ready for the long stretches between camps such as Grahan, Min Thach, and Nagaru, where the climbs are steady and sometimes steep.
How to Achieve This Fitness Goal
-
Start early: Begin training at least 6–8 weeks before your trek for gradual improvement.
-
Jog 5 days a week: Start with 2 km runs and build up to 5 km over 2–3 weeks.
-
Focus on stamina: Once you can cover 5 km comfortably, work on improving your pace daily.
-
Track progress: By the final two weeks before your trek, you should consistently complete 4.5 km in under 40 minutes.
-
Add strength training: Include squats, lunges, step-ups, and stair climbs to strengthen your legs and improve balance for rocky Himalayan trails.
-
Core & flexibility: Add planks and stretching to maintain posture and stability while trekking with a backpack.
Why This Matters
Proper physical preparation helps prevent fatigue, altitude discomfort, and muscle strain. The better your endurance, the more energy you’ll have to truly enjoy the beauty of the Himalayas — from pine forests and meadows to snowfields and the final climb to Sar Pass.
Trek Leader’s Note
Every trekker dreams of standing at the Sar Pass summit, but few realize that victory begins weeks before the trail. Fitness is not about being the fastest — it’s about being steady, resilient, and aware of your limits. Prepare patiently, stay consistent, and train your body as if you’re already walking through the Himalayas. When you finally reach that snowy ridge, every step will feel worth it.
Recommended Training & Exercises for Sar Pass Trek
Bodyweight Training Guide for Sar Pass Trek Preparation
Trekking in the Himalayas, especially on the Sar Pass Trek, demands more than enthusiasm — it requires strong legs, a stable core, and good cardiovascular endurance. Bodyweight exercises are one of the best ways to prepare for high-altitude trails. They help build strength, balance, and agility without the need for gym equipment — just discipline and consistency.
1. Lower Body Strength
Your legs do most of the work on the mountains — from climbing steep slopes to controlling descents.
-
Squats: Strengthen your quadriceps, glutes, hamstrings, and calves — the power muscles behind every ascent. Maintain proper form with a straight back and heels grounded.
-
Lunges: Improve balance and flexibility while strengthening the lower body. Alternate legs to mimic uphill steps and uneven Himalayan trails.
2. Upper Body Stability
Your upper body supports the backpack and helps maintain posture on long treks.
-
Push-Ups: Build shoulder, chest, and arm strength — crucial for carrying your rucksack and maintaining stability on rugged trails.
-
Pull-Ups / Bodyweight Rows: Strengthen the back, shoulders, and biceps. This reduces fatigue and prevents shoulder strain from prolonged backpack use.
3. Core Strength
A strong core helps maintain stability on uneven terrain and improves balance when trekking with gear.
-
Planks: Strengthen the abdominals and lower back while improving endurance for long walking hours.
-
Russian Twists: Target the obliques and improve rotational strength, essential for maneuvering through tricky slopes and snow trails.
4. Full Body & Cardiovascular Endurance
High altitude trekking is all about sustained effort and lung power.
-
Burpees: Engage the full body — legs, arms, and core — improving stamina, strength, and agility.
-
Mountain Climbers: Enhance cardiovascular endurance and core engagement, simulating the constant motion of trekking uphill.
How to Train
Practice these exercises 4–5 days a week with proper form and rest days in between. Combine strength work with jogging or stair climbing to build stamina. Stretch before and after workouts to prevent injury and maintain flexibility — both crucial at high altitude.
Trek Leader’s Note:
The Himalayas test not just your spirit but your physical preparation. I’ve seen trekkers struggle not because the mountain was tough, but because their body wasn’t ready. A few weeks of consistent bodyweight training can make your Sar Pass Trek not just achievable, but deeply enjoyable. Build strength, respect your body, and remember — endurance is your greatest asset on the mountain. And also during these many years of my career in himalayan trekking and expeditions with Dream Trips I have seen that most people fail or quit in the beginner friendly treks like sar pass trek , kedarkantha trek , hampta pass trek because they take things for granted and think of the trek like an usual hill station tour . You have to to leave your city habits and also need to quit smoking and the consumption of alcohol atleast during the trek because in the himalayas , dehydration is your biggest enemy.
Our Trekkers Reviews And Experiences
Food Provided By Us During Sar pass Trek
Good food is the backbone of a great Himalayan trek. During the Sar Pass Trek, we at Dream Trips ensure that every meal you eat keeps you energized, light, and ready for the trail ahead. Our meals are freshly prepared by our mountain kitchen team, focusing on nutrition, taste, and safety at high altitude.
During the Sar Pass Trek, we provide five wholesome meals a day — breakfast, lunch, evening snacks, soup, and dinner — starting from Day 1 lunch to Day 5 breakfast. Each meal is freshly cooked in the mountains by our experienced kitchen team, focusing on nutrition, hygiene, and taste to keep you energized throughout the trek.
All our meals are vegetarian, but we also include boiled eggs at breakfast for an extra dose of protein. The menu features simple, home-cooked dishes — light, non-spicy, and packed with nutrients to help with acclimatization and muscle recovery. For the first three days, we serve packed lunches that are easy to carry and eat on the trail, while on the fourth day, you’ll enjoy a hot lunch at the campsite, freshly prepared after your climb.
We recommend bringing your own tiffin box for packed lunches, though you can also purchase one directly from us before the trek. Our meals are designed to maintain a healthy balance of carbohydrates, proteins, and essential minerals, ensuring your energy levels stay consistent even during steep ascents or long walking hours.
Trek Leader’s Note:
In the Himalayas, good food isn’t a luxury — it’s your strength. I’ve seen how a warm soup or a balanced meal can completely change a trekker’s day. Every bite you eat here is made to help your body adapt to the mountains, fuel your climb, and remind you that even in the toughest terrains, comfort can be found in a plate of hot food.
Our Safety Standards of Sar Pass Trek
Trekking with Dream Trips on the Sar Pass Trek is completely safe — not because the mountains are predictable, but because our team is prepared for every situation. We follow strict, field-tested safety protocols developed through years of Himalayan experience to ensure your well-being from start to summit.
Every trek is led by certified trek leaders trained in Wilderness First Aid, CPR, and high-altitude medical response. Our leaders undergo professional training from reputed institutions like the Nehru Institute of Mountaineering (NIM), Indian Mountaineering Foundation (IMF), and Hanifl Centre for Outdoor Education, Mussoorie. Each of them has real experience handling high-altitude conditions, emergencies, and trek logistics across the Himalayas.
During the Sar Pass Trek, we pitch a basic medical tent at every campsite, equipped with a complete first-aid kit, pulse oximeter, and emergency oxygen cylinders. Our leaders take your daily oxygen and pulse readings to monitor acclimatization. If any signs of Acute Mountain Sickness (AMS) appear, we act immediately — adjusting your pace, oxygen supply, or in rare cases, beginning a controlled descent.
Unlike other companies, we advise trekkers not to carry or self-medicate with generic medicines. A headache or fatigue at altitude can be a symptom of something more serious, and taking over-the-counter medication can delay proper treatment. Our trained trek leaders handle all medical supervision and carry specialized medicine kits suitable for high-altitude trekking.
We also ensure technical and communication safety through the use of radio walkie-talkies, microspikes on snow trails, and stretchers on standby for quick evacuation if required. All snowy slopes are managed by a technical safety team using mountaineering-grade equipment.
From filtered drinking water to hygienic, freshly prepared meals, every part of our operation follows strict safety and health standards. Our team is fluent in English and Hindi, ensuring clear communication at all times — whether it’s guidance on altitude, weather updates, or safety instructions.
Trek Leader’s Note:
Safety isn’t just a rule for us — it’s a ritual. Every time I lead a group to Sar Pass, I remind them that the mountain will always be there, but our health and awareness are what make the journey meaningful. Listen to your body, follow your trek leader’s guidance, and never ignore even the smallest sign of discomfort. The summit is beautiful, but the real success is returning safe, strong, and smiling.
Must Read These Information
-
Where do we stay during the Sar Pass Trek?
You’ll stay in tented campsites at scenic locations like , Min Thach, Nagaru, and Biskeri Thach and in grahan village you will stay in a local home stay for the perfect touch of authenticity. Each campsite has sleeping tents, dining tents, toilet tents, and foam mattresses for comfort.
-
What kind of food is served during the trek?
We serve five freshly cooked vegetarian meals every day — breakfast, lunch, evening snacks, soup, and dinner. Meals are simple, healthy, and non-spicy, perfect for digestion and altitude. Boiled eggs are included for protein.
-
Is the Sar Pass Trek safe?
Yes, 100%. At Dream Trips, safety comes before everything. We have medical tents at every campsite, carry oxygen cylinders, oximeters, and first aid kits, and all trek leaders are certified in Wilderness First Aid and high-altitude response. We also take your oxygen and pulse readings daily.
-
How difficult is the Sar Pass Trek really?
It’s not too hard but not a walk in the park either. You’ll trek around 48 km in 5 days, with gradual altitude gain from Kasol (5,000 ft) to Sar Pass (13,800 ft). The trail includes forest climbs, ridge walks, and snow crossings — challenging but absolutely doable for anyone who prepares.
-
What is the best time to do the Sar Pass Trek?
The best season is mid-April to early June. April gives you blooming forests and mild weather, while May brings snow-covered trails and that postcard-perfect Himalayan view.
-
Is the Sar Pass Trek suitable for beginners?
Yes, completely. The Sar Pass Trek is graded Easy to Moderate, meaning even first-time trekkers can complete it with a little preparation. If you can walk 4.5 km in 45 minutes or jog regularly for a few weeks before the trek, you’ll do great.
-
What makes the Sar Pass Trek special?
Honestly, Sar Pass is one of the few treks that gives you everything — dense pine forests, alpine meadows, snow-covered slopes, and breathtaking summit views. You start from the colorful cafés of Kasol, pass through Grahan Village and Min Thach, and finally stand on a snowy ridge at 13,800 ft. The snow slide from Sar Pass is every trekker’s favorite moment — a thrill you never forget.
Frequently Asked Questions
-
Why should I choose Dream Trips for the Sar Pass Trek?
Because we treat trekking as a passion, not a business. Dream Trips is known for its certified trek leaders, safety-first approach, nutritious food, and local expertise. Every trek is personal — you’re not just another booking, you’re part of the team.
-
What fitness level do I need?
You should be able to jog 4.5 km in under 45 minutes. Basic exercises like squats, lunges, and stair climbs will strengthen your legs. Start training 4–6 weeks before the trek.
-
Do I need travel or trek insurance?
It’s optional but highly recommended. Trek insurance covers altitude sickness, evacuation, or medical emergencies. Plans start from ₹210, and we’ll help you arrange one before departure.
-
What if I feel sick or tired during the trek?
Tell your trek leader immediately. We carry oxygen, first aid, and medicines, and have a trained medical team at each campsite. If needed, our evacuation team and porters ensure you descend safely.
-
What should I pack for the Sar Pass Trek?
Carry layered clothing, waterproof trekking shoes, woolen socks, gloves, a reusable water bottle, headlamp, and a tiffin box (for packed lunches). You can buy one from us if needed. Keep your backpack light — around 8–10 kg max.
-
Is there network connectivity or electricity during the trek?
You’ll have mobile network till Grahan Village, but after that, the Himalayas take over. No charging points are available, so carry a power bank.
-
How cold does it get during the trek?
Expect day temperatures between 10°C to 15°C, while nights at higher camps like Nagaru can drop to -5°C. Proper layering is key — wear thermals, fleece, and a down jacket.
-
How to reach Kasol for the trek?
Kasol is easily accessible by overnight semi-sleeper Volvo buses from Delhi or Chandigarh. (Note: Sleeper buses are banned in Himachal Pradesh.) You can also fly to Bhuntar Airport, just 31 km away, and take a 1-hour cab ride to Kasol.
Similar Treks
Recognition & Association